No-heat hairstyles
In an effort to prepare for a five-day camping extravaganza in Chile where I will not be able to bring any hair tools, I’ve been trying out new “no-heat” curling styles. I figured this is not only good for camping, but also would be a great way to limit the amount of appliances you bring on any trip.
I never bring a hairdryer anymore, because you have access to hairdryers almost anywhere. In Europe, I strongly recommend using theirs because not only does it plug in without an adapter, but you don’t have to worry about blowing a fuse with your high-powered dryers. (And yes, I have done that before. Oops. Sorry, Ridgemount Hotel!) I even looked up the cost of a hairdryer at their drugstore nearby to see if I was in a pinch, I could buy one. You can get one for $10, just like here. So honestly, do you really want to waste valuable luggage space with that bulky item? Or spend $10 there, if for some strange reason the place you’re staying doesn’t have one?
I never bring a hairdryer anymore, because you have access to hairdryers almost anywhere. In Europe, I strongly recommend using theirs because not only does it plug in without an adapter, but you don’t have to worry about blowing a fuse with your high-powered dryers. (And yes, I have done that before. Oops. Sorry, Ridgemount Hotel!) I even looked up the cost of a hairdryer at their drugstore nearby to see if I was in a pinch, I could buy one. You can get one for $10, just like here. So honestly, do you really want to waste valuable luggage space with that bulky item? Or spend $10 there, if for some strange reason the place you’re staying doesn’t have one?
So normally I don’t bring a hairdryer, but I always find one to use. I usually bring a curling iron or a straightener. I don’t typically bring both, because I think it’s a waste of space. But now, I’m faced with a new challenge. No hairdryer. No curling iron. No straightener. Sure, people all over the world don’t use them. But I’m an American woman and have been used to these luxuries, so this is a challenge I have to face. How do I get my hair to look good without the use of these helpful aids? I know it’s not going to look fantastic, and I know it’s not a big deal if I look like I just rolled out of a dumpster. However, if there’s a good, easy alternative, count me in!
There are many Pinterest posts and YouTube videos on variations of no-heat curling styles, some include actual hair tools or fancy bands. I was looking for ones with minimal items such as a few hair ties or bobby pins. Some of the looks could even be worn during the day as an updo, and then taken down the next day for a long wavy hair look. I like the flexibility of these different hairstyles, as well as the little effort you put in for a good look.
A couple styles that work well, with minimal effort:
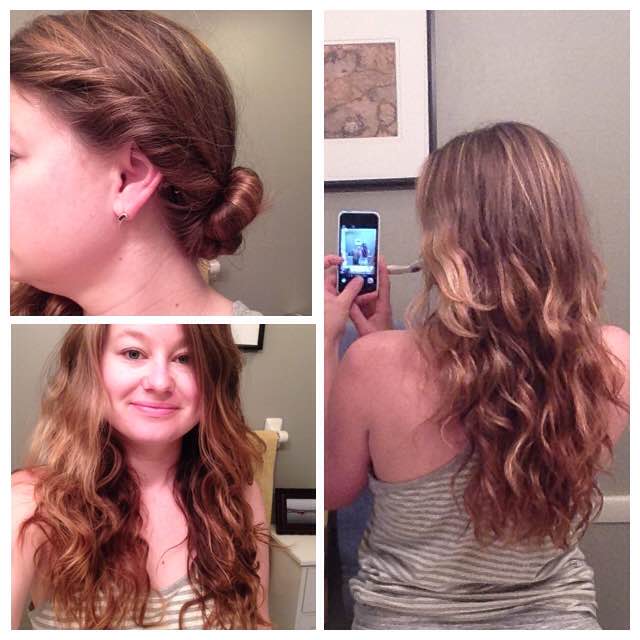
1. Twist and pin.


There are many Pinterest posts and YouTube videos on variations of no-heat curling styles, some include actual hair tools or fancy bands. I was looking for ones with minimal items such as a few hair ties or bobby pins. Some of the looks could even be worn during the day as an updo, and then taken down the next day for a long wavy hair look. I like the flexibility of these different hairstyles, as well as the little effort you put in for a good look.
A couple styles that work well, with minimal effort:
1. Twist and pin.

I split my hair in two sections. I twisted it down the side of my head, and pinned it to secure it to the side of my head. Then I just twisted the hair until it was tight and naturally curled itself up into a ball, then I pinned it. I repeated on the other side, and voila!
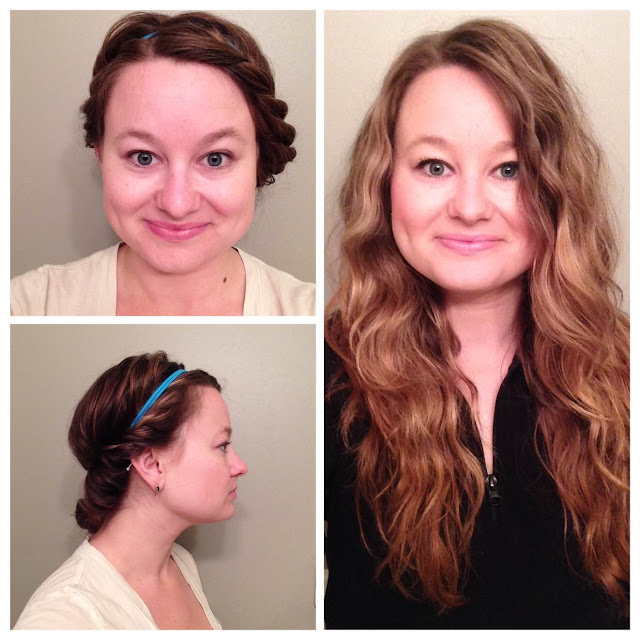
2. Flat twist

This hairstyle did not stay together well while I was sleeping. It fell out and actually took me longer to learn. So I did two flat twists and then tucked it in a headband. My husband said I looked very Renaissance. It’s basically a braid with two sections, instead of three. It had tighter curls and looked more like a braid. I preferred the twist for the lose beach curl look. This one is more of what I used to do in middle school with a crimper. Remember those?
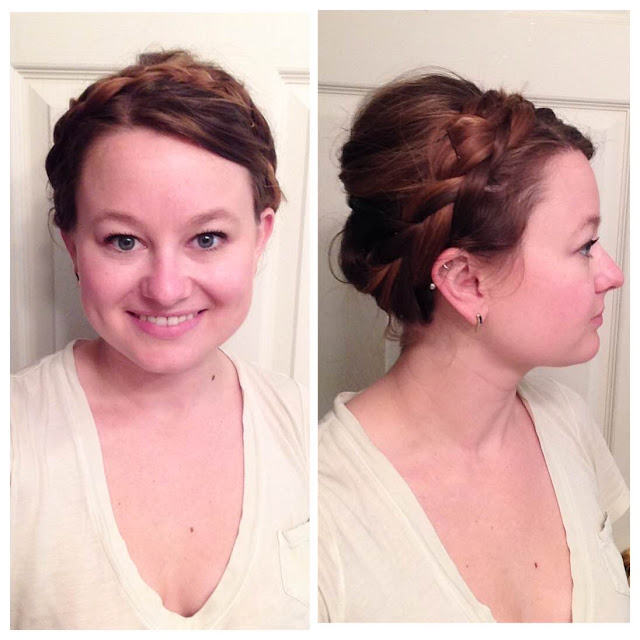
3. Braided up-do

The next two up-do styles I stole from Keiko Lynn. She had some great ideas for updos. I think this one is a good idea because you can do it when your hair is wet and the next day, undo it and wear your hair down and curly. So this is updo can serve two purposes, I think.
4. Up-do with scarf

This one is so simple and I think it’s perfect for hiking. It keeps your hair out of the way, but it’s got that classic vintage look, as well. This is a great do for when your hair is unwashed and a mess.
Of course, you can always go with this classic style. I call this the “I’ve been wearing yoga pants for 4 days straight look.”
